Creating a GroupShare
From the My Documents Tab
1. Select a method from the list below:
List View
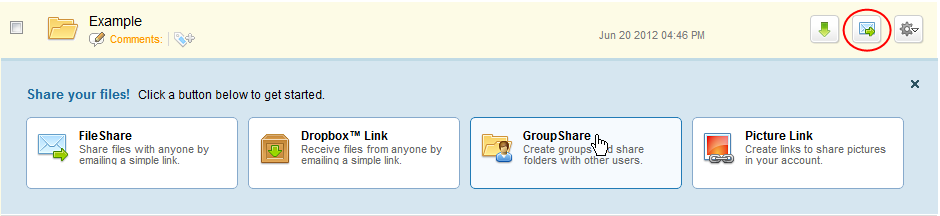
Click the mail icon with a small green arrow as shown in red below. Click the GroupShare tab that appears below.
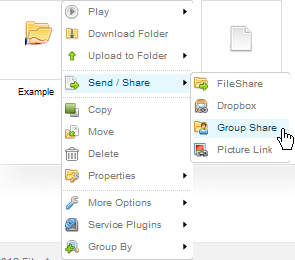
Icon View
Hover over a folder icon and click the downward facing arrow that appears in the top right hand corner. Scroll down to Send/Share, and select GroupShare.
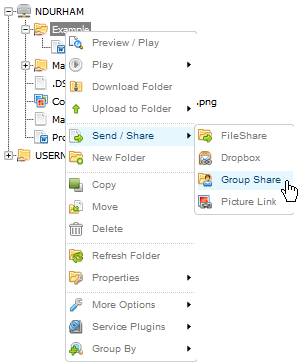
Tree View
Right click on a folder, scroll down to Send/Share and click Group Share.
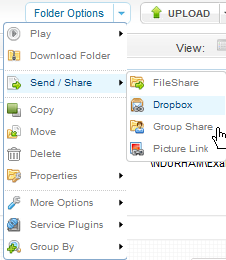
Chart/Bar View
Click the Folder Options menu, scroll down to Send/Share, and click Group Share.
From the Share Tab
Open the Share Tab and click Create GroupShare

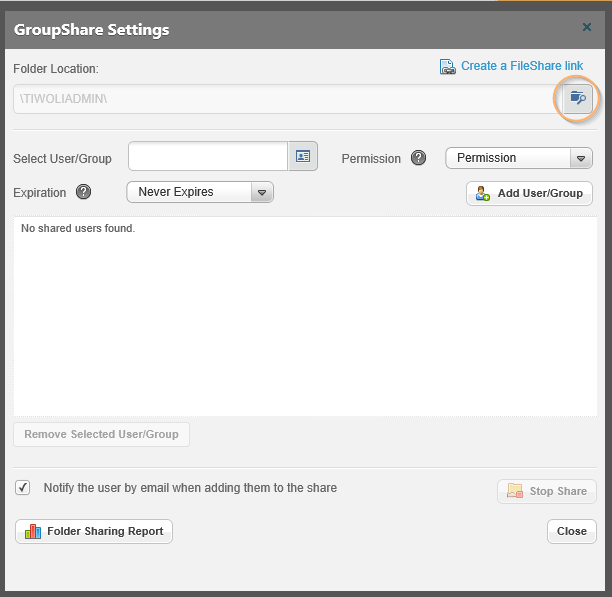
2. Click the Search Folder icon circled in red below to select a folder to GroupShare.
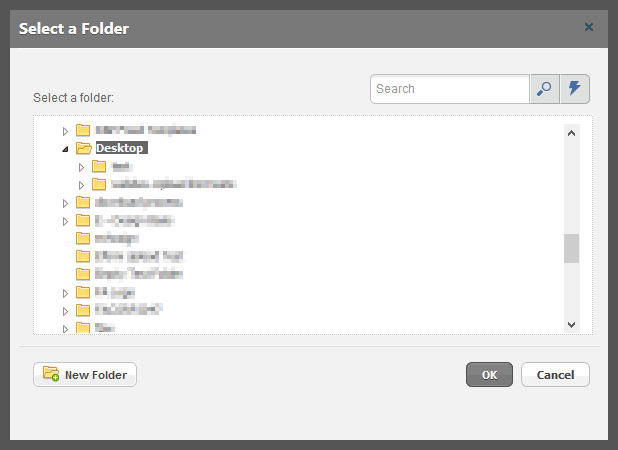
3. Select a folder from the list in the window that appears and click OK.
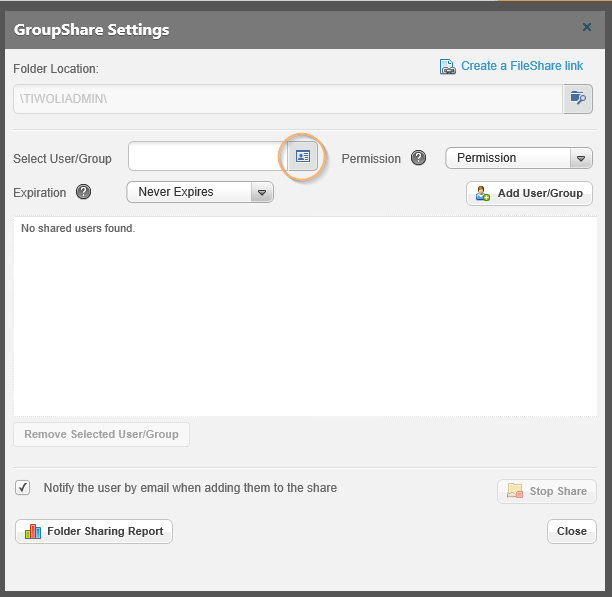
4. Click the Contacts icon circled in red below to select user(s) to send a GroupShare.
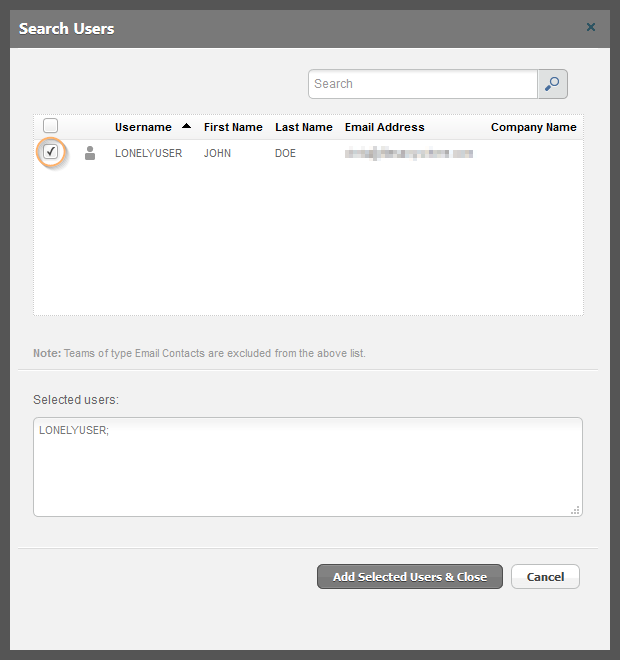
5. Check the empty box next to all user(s) you wish to add to the GroupShare list, then Click Add Selected Users & Close.
6. Select a permission level for the user(s).
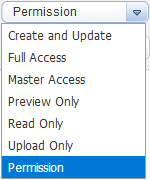
Full Access - Allows users to view, create, update, and delete files in the shared folder. This provides general access and usability of the folder, though it prevents the folder itself from being shared and the recipient is unable to modify the folder settings.
Create and Update - Allows users to view, create, upload, preview, and update/edit files in the shared folder.
Read Only - Allows users to view files in the shared folder and download the files. Users are unable to upload, edit, or modify the folder or its contents.
Master Access - Grants the users to view, create, update, delete, and Groupshare your folders.
Preview Only - Prevents users from downloading any type of the file, though they are able to view them using the FilesAnywhere previewer.
Upload Only - Only allows users to upload the files. They are unable to preview, download, or edit them.
7. Select the Expiration for the GroupShare.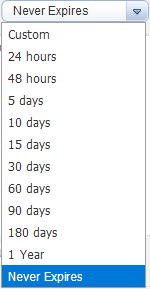
- Custom - Allows you to set a specific date and hourly time for the expiration to occur.

- 24 hours to 180 days - Allows you to used predefined expiration ranges.
- Never Expires - Will prevent the GroupShare from expiring.
8. Click on the Add User/Group button to finalize your settings.

Still Have Questions?
If you need help or have additional questions, please contact us.
0 Comments