History: Workflow has evolved from the online Project Management service called WorkTracker which we launched in 2004.
Almost every organization has several business processes which pass through several stages, from initiation to completion, by automating repeating tasks and flow of information and documents from one employee to another and from one department to another. With the help of the Workflow module, you can simplify such business processes.
An example of a business process is a purchase request by an employee. To help you understand the Workflow module, let's term each purchase request as a Ticket. When you create a workflow for the purchase request business process, you are actually defining the sequence of steps each such ticket will follow from its initiation to its completion. While creating a workflow you can define custom fields, rules, notification actions and time based triggers for each of the steps the ticket will follow through. Once completed, the workflow can be emailed to others as a link for creating a ticket for the business process for which the workflow has been created.
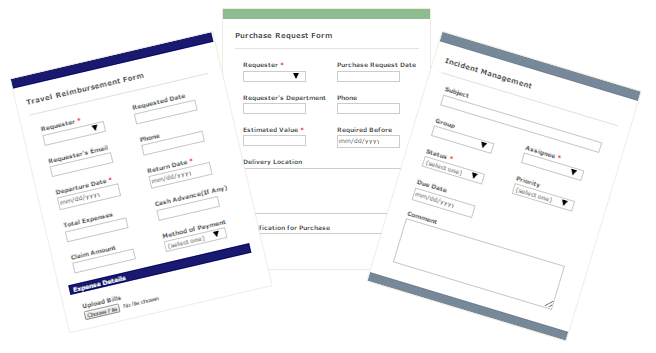
Do you have pre-designed forms for your business processes? You can use it right away!
Use your existing PDF or HTML forms for data collection and processing, or, select one from the list of available custom form layouts for your workflow.
Note: The Workflow module is only available for Professional/Enterprise accounts.
To get started, login to your account and click on the Workflow tab.
Note: If you do not see the workflow tab, contact your site administrator to enable workflow for your site. Workflow option is available in the Site Configuration / General Tab of the administration console.

This will take you to the Getting started with Workflow page.
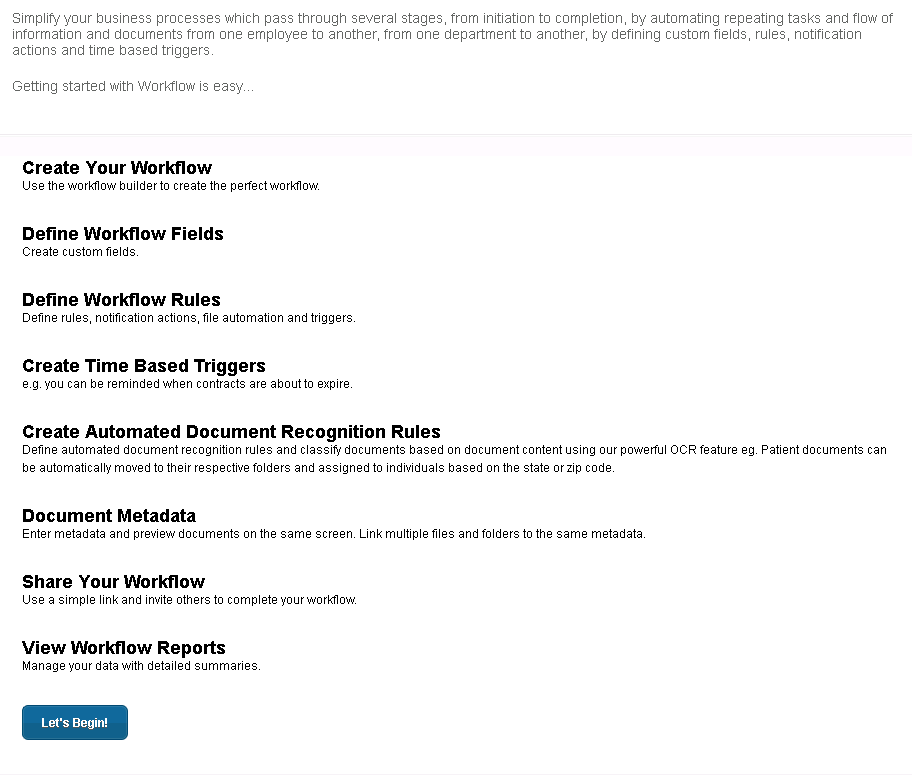
Click on the Let's Begin! button to create your first workflow. You can choose from the available workflow templates, or, create your own workflow.
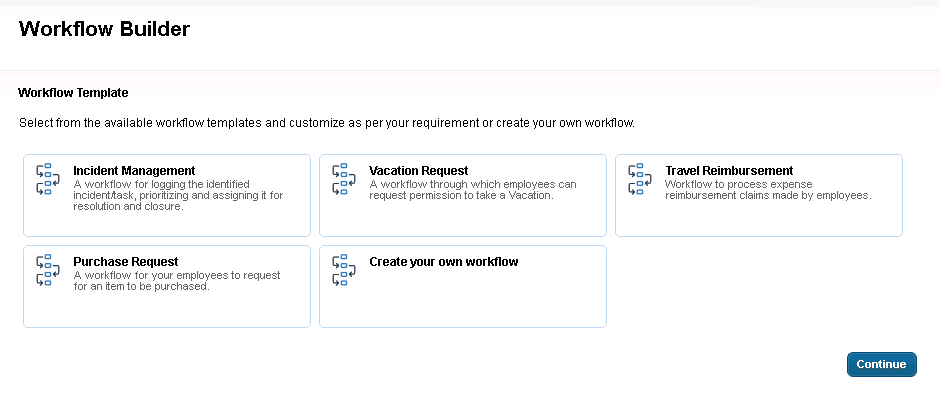
If you select Create your own workflow you will have to design your workflow from scratch. If you select a template, the new workflow will be pre-populated with the fields, steps, and permissions already defined in the selected template.
Make a choice and click on the Continue button. This will take you to the Workflow Builder where you can design your workflow.
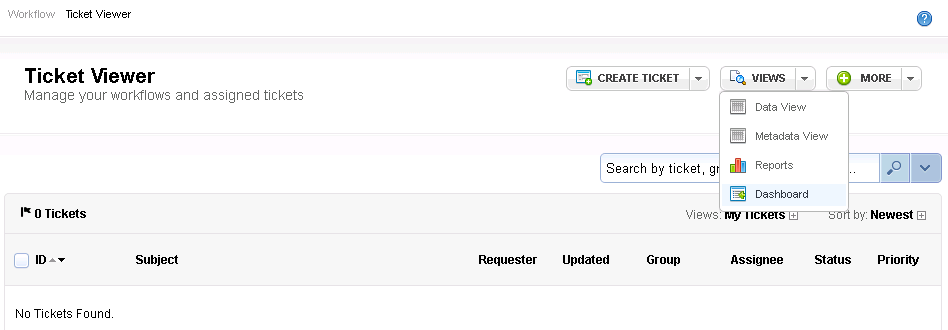
If you have already created a Workflow at any point of time, then, clicking on the Workflow tab will take you to the Ticket Viewer. The option to create a new workflow is available on the ticket viewer page under More options:
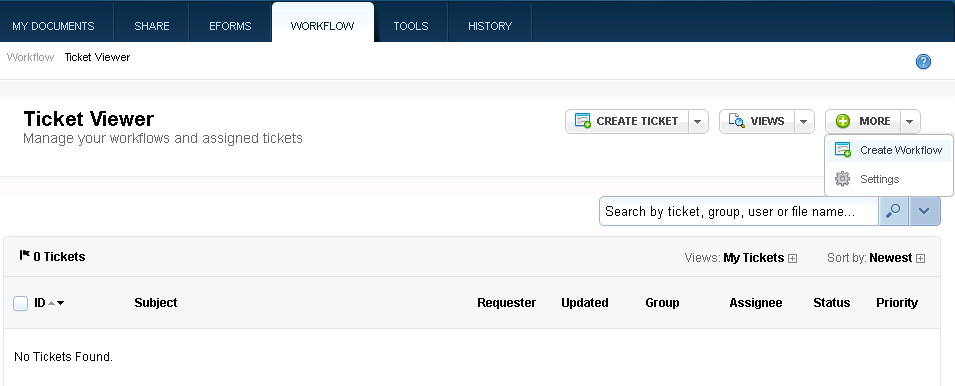
You may also go to the Workflow Dashboard and click the Create Workflow button to create a new workflow.

Did you know: You can create ADR Triggers with Workflow to completely automate the flow of documents e.g. document gets uploaded, workflow ticket gets created automatically, and gets assigned to supervisor for approval!
Designing a workflow involves 6 simple steps:
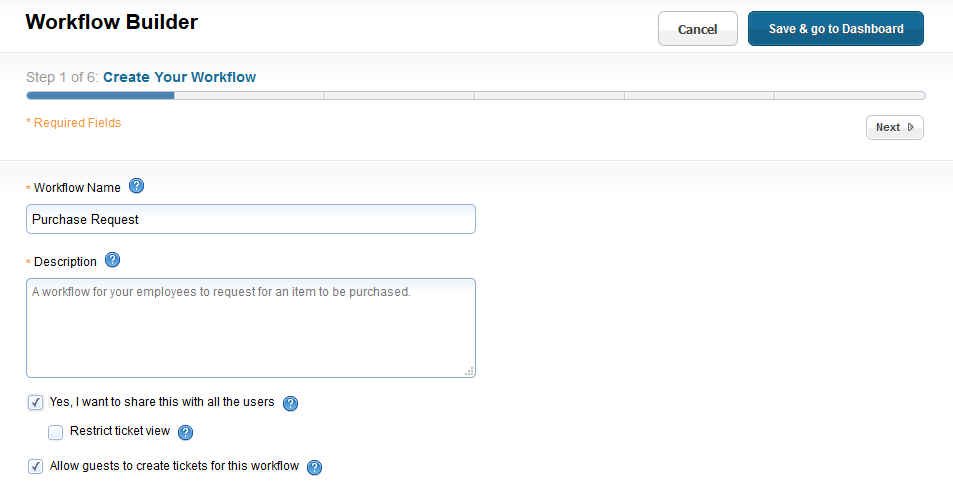
Step 1: Add a name and a description for the workflow.
-
Fill in the Workflow Name and add a short description about the workflow.
-
If the "Yes, I want to share this with all the users" checkbox at the bottom is checked, it means that the workflow will be shared with all the users in your account. They can view and initiate tickets using this workflow. Uncheck it if you want to share it only with specific users and not with all the users.
- If the "Yes, I want to share this with all the users" checkbox at the bottom is checked, then workflow owner can apply restricted ticket view to all the users to whom the workflow is shared. Check the "Restrict ticket view" checkbox to restrict the ticket view to only those tickets that are either created by or assigned to the user, or, the user has participated at any step of the ticket life cycle.
-
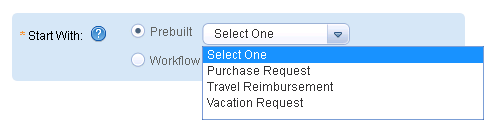
When you choose to Create your own workflow and you have already created a workflow in the past, the Prebuilt section is available. Click the Prebuilt option and, from the dropdown menu, select the desired workflow which you want to use as a template for creating the new workflow .
Step 2: Build your workflow by adding fields.

-
You can add section headers, fields to get textual input, provide selection from a dropdown or checkbox or radio button list and you can select many more from the Standard and Advanced Fields.
-
Fields can be configured as Required (user must provide an input), Unique (the same value has not been submitted in the past), or Calculated (value will be calculated from a specified formula), etc. Visit the configuring workflow fields article for complete details on setting up fields.
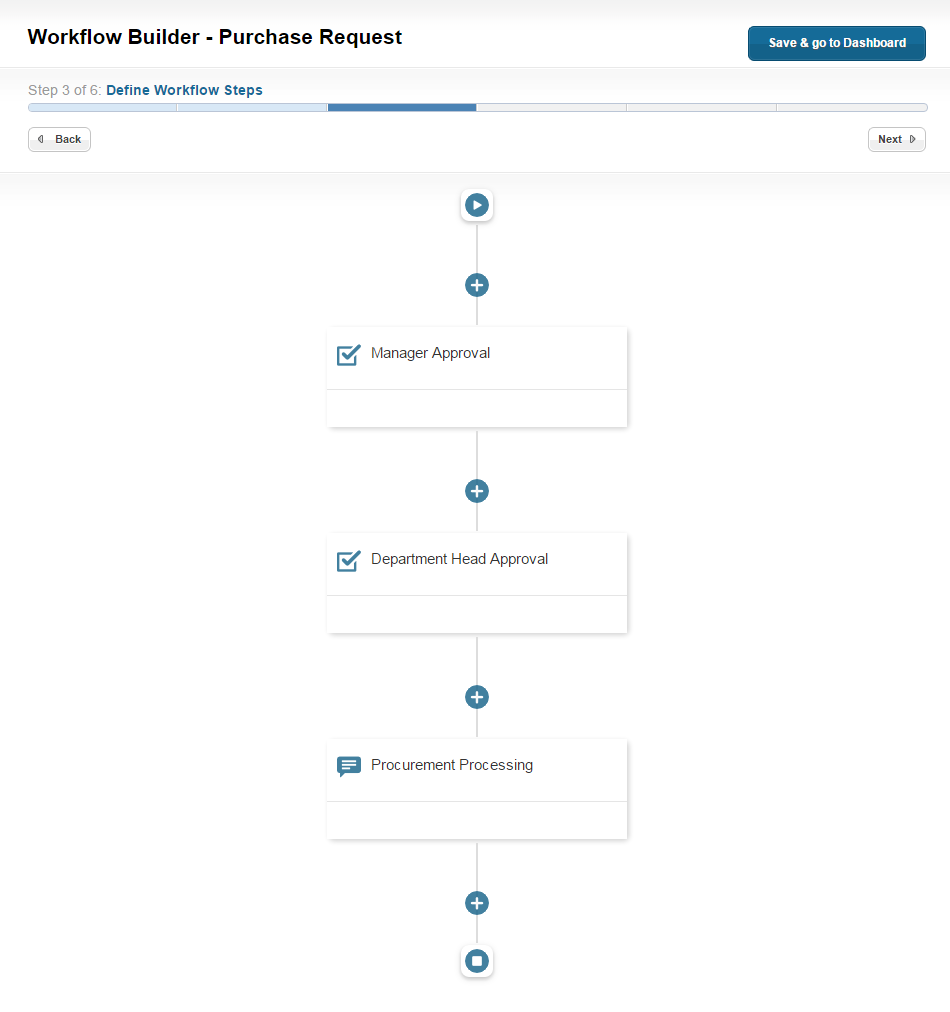
Step 3: Define the workflow steps.
- A workflow is a set of sequential steps which have to be performed for the request to be completed. You can add steps by clicking
 .
.
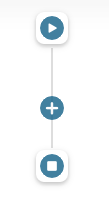
This will show you the options available for the type of steps which you can select to be added.

- You can select to add an Approval Step, an Input Step or a Parallel Branch.
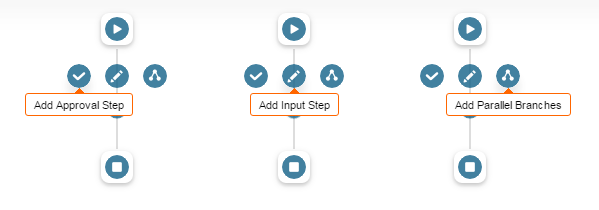
- For example, the purchase request workflow needs to go through various approval and input steps e.g. Manager Approval, Department Head Approval and Procurement Processing.
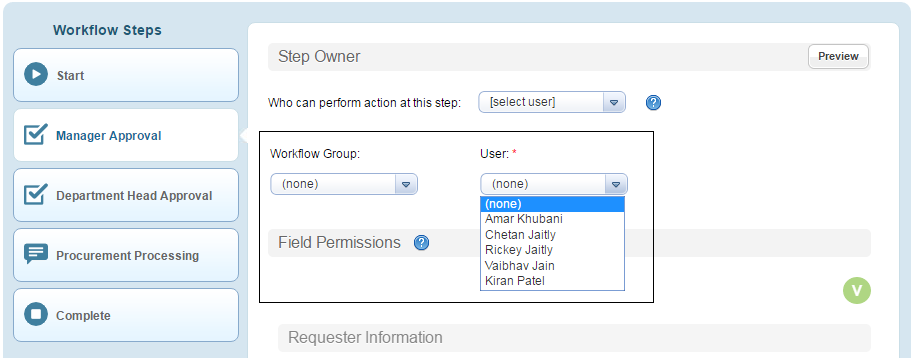
Step 4: Define step owner and field permissions.
Here you can set the view or edit permissions on the fields for each step of the workflow.
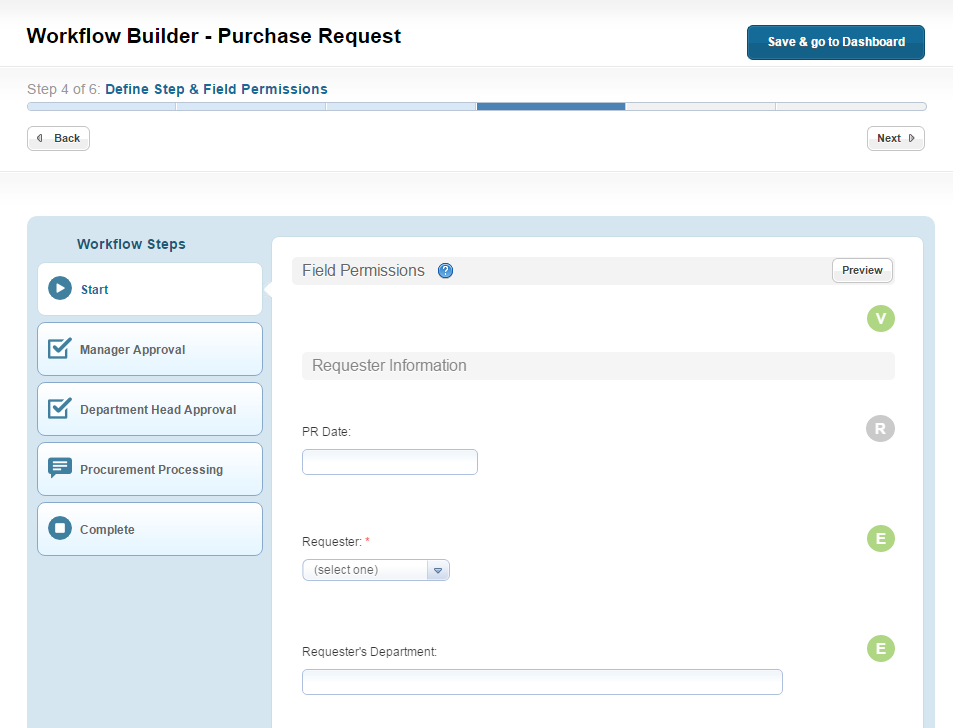
-
The person who initiates a ticket will see the Start screen first. By default, all the fields on the Start screen are Editable.
-
For all other Intermediate steps and the Complete step, by default, all the fields are Read-Only.
-
You can set/modify the permissions and visibility by hovering over the fields.

- You can click on the steps listed in the left panel and set the permissions for the fields at each step. Click the Preview button to view how the workflow ticket will be visible at a particular step.
- For all the intermediate steps you are required to set the Step Owner. Step owner is the user who is supposed to take action on the ticket at a particular workflow step.
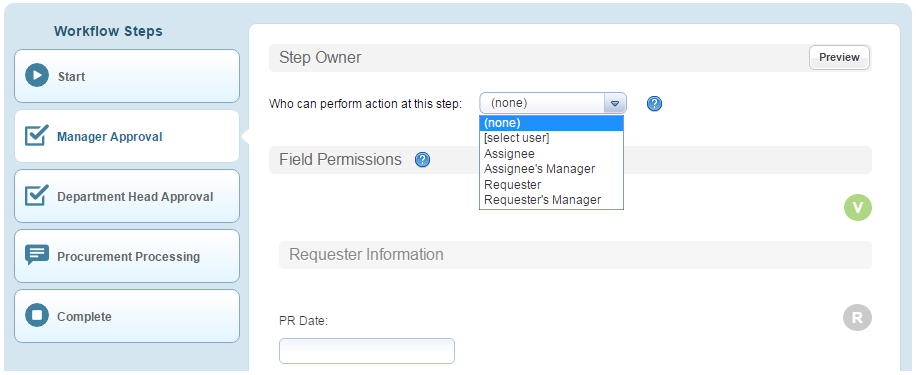
Step owner can be set as:
-
Assignee - The selected user in the assignee field while submitting the ticket.
-
Assignee's Manager - Manager of the user selected in the assignee field while submitting the ticket.
-
Requester - The requester of the ticket.
-
Requester's Manager - Manager of the requester of the ticket.
-
Specific User - To set the step owner as a specific user choose select user from the dropdown menu. This will provide you with the Workflow Group and User selection dropdowns.
Basic rules for setting the step owner:
-
On selecting step owner as Assignee's Manager or Requester's Manager please make sure that the Manager is associated with all Users. You can see your manager on the Profile page. If manager is not set, ask your system administrator to associate a Manager with the Users on the Edit User page of the administration console.
-
On selecting the step owner other than Assignee, sets the ticket step transition to automatic. That is, while submitting a ticket user is not required to select the assignee of the ticket and ticket moves to the next step and gets assigned to the user as per the step owner configuration. For this to function properly, the assignee field of the previous step should be set as Hidden or Read-Only, it cannot be set as Editable.
Step 5: Custom Form Layout & Export Configuration.
Here you can upload your pre-designed forms and use them with the Workflow module.
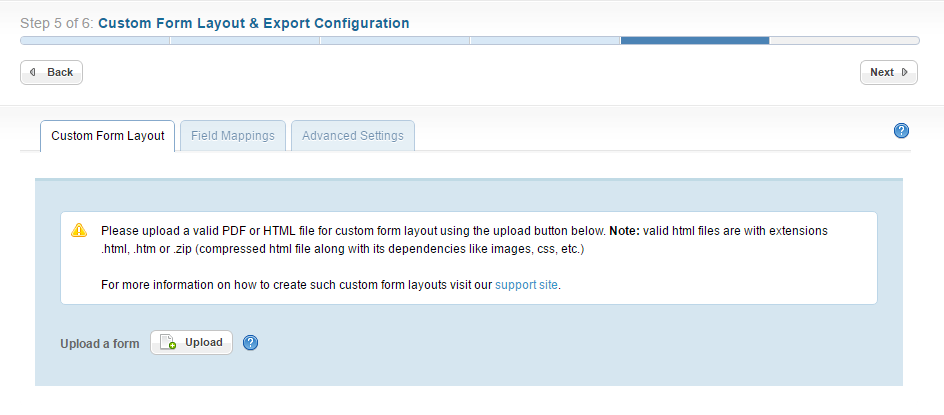
Using this path-breaking Custom Form Layout module, you can associate existing Workflow fields with fields on custom designed PDF or HTML forms so that when data is submitted to the Workflow Ticket, it is accepted into the custom designed form instead of the standard Workflow form. Submitted data can also be exported out into these custom designed forms.
View the custom form layout article for detailed information on Custom Form Layout & Export Configuration.
Step 6: Workflow settings.
Here you can set the workflow theme & header, share the workflow with users, set rules, notification actions and time based triggers.

Visit the following links for detailed information on different workflow settings:
Once you have made all the settings, click on Save & Go to Dashboard. This will take you to the Workflow Dashboard, where you can create, view, or manage Workflows in your account.
Still Have Questions?
If you have further questions, please feel free to contact us and we will be happy to assist you.
0 Comments