Overview
Below information is needed to configure OneLogin to sign in users into FilesAnywhere using SAML:
|
{SAML URL} |
https://private.filesanywhere.com/OneLogin.aspx |
|
{Client ID} |
<Update ClientID here> |
|
{Company Code} |
<Update Company code here> |
Your OneLogin Administrator needs to configure FilesAnywhere application as Trusted application as per below steps. Also you will need to request for FilesAnywhere to enable the single sign-on functionality. They will need the SAML HTTP Endpoint and the SAML Metadata XML.
Things to note:
- Replace {Client ID} with your Client ID, I.E. 1324
- Replace {Company Code} with your Company Code, I.E. MYACCT
OneLogin Setup
- Login to your OneLogin administration account.
- In OneLogin, navigate to Apps > Find apps and search for Click Add.
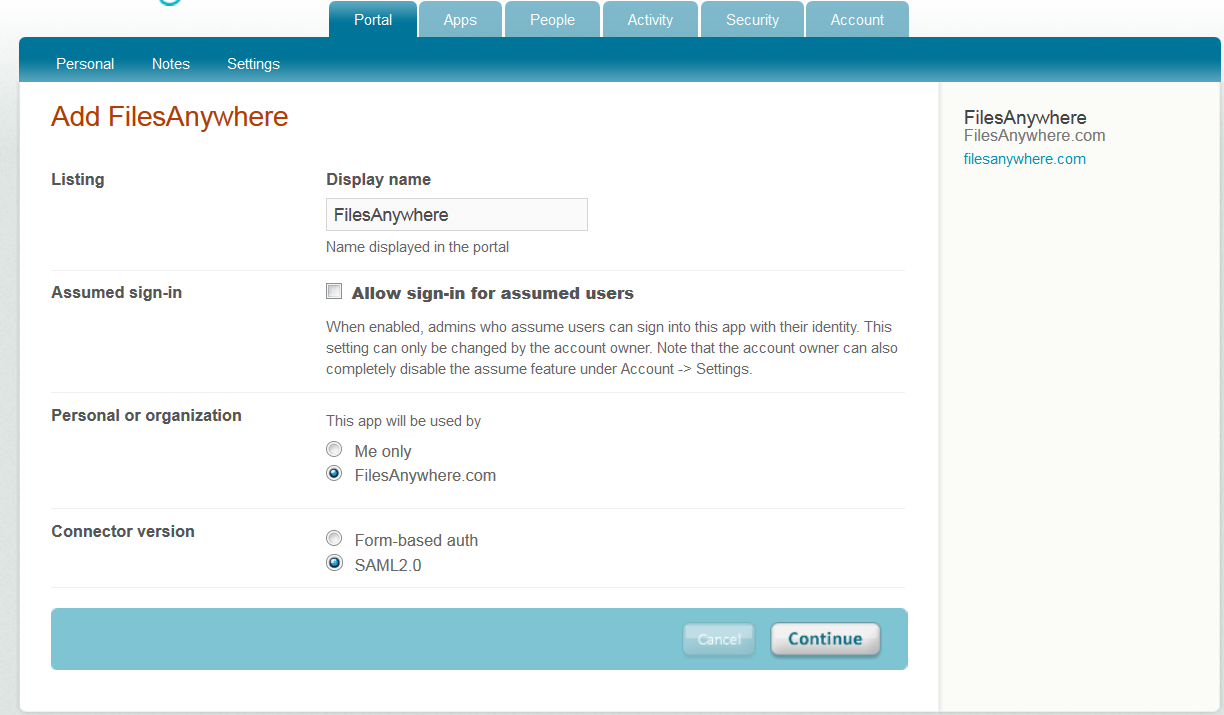
- In the Add FilesAnywhere screen select for the app to be used by the Organization and select SAML 2.0 for the Connector Version. Press Continue
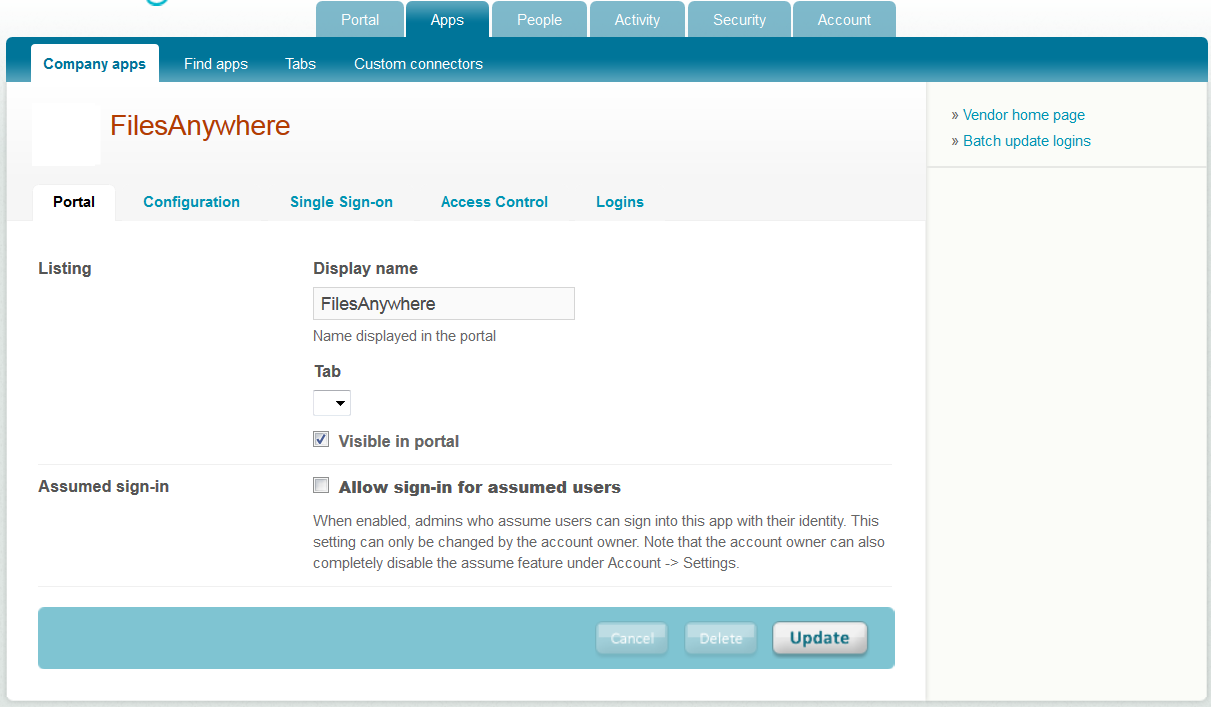
- Under Portal tab make sure that Visible in Portal option is checked. Click on Update and navigate to Configuration
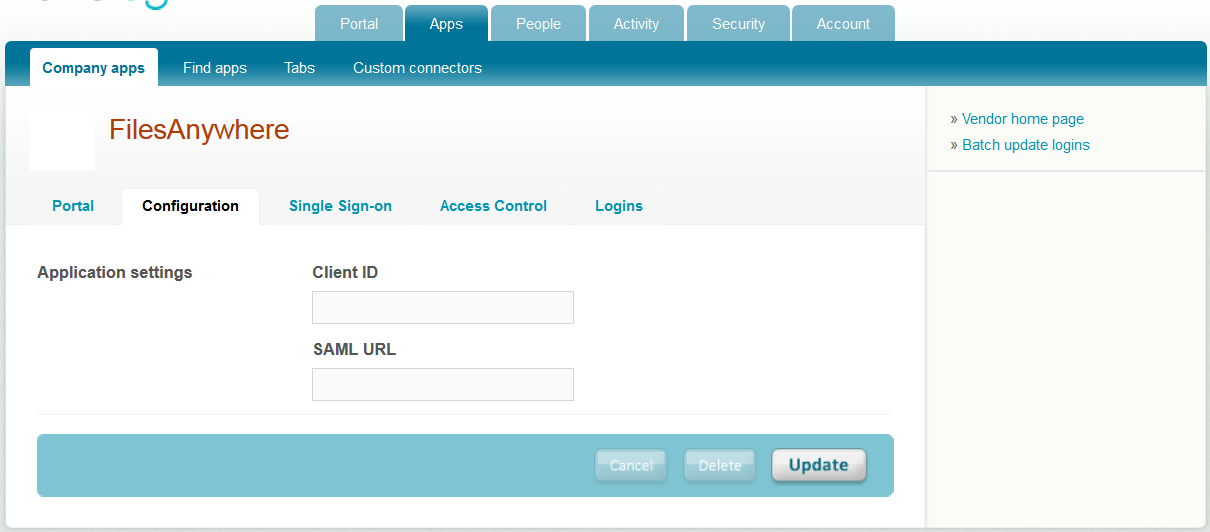
- In the Configuration tab input {Client ID} and {SAML URL} given in step 1 and click on Update. Navigate to Single Sign-On tab.
- Under the Single Sign-on tab set the credentials to Configured by admin and use the default values as per below screen:
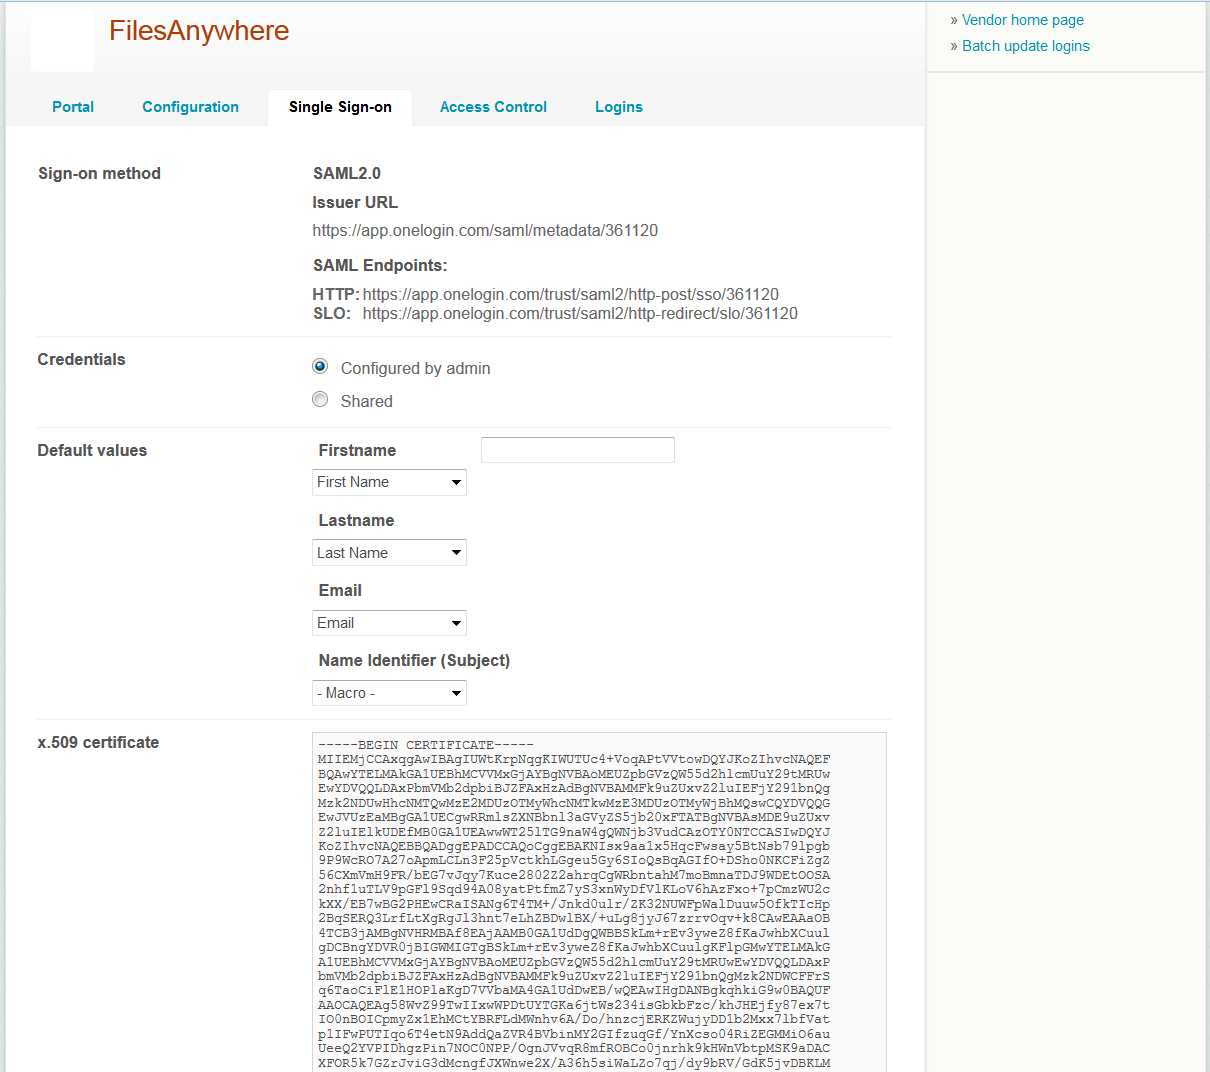

Note: In above screen Issuer URL, SAML Endpoints and x.509 certificate values will be different for each customer, so customer needs to provide values from their OneLogin admin console.
- In this step you will need to request FilesAnywhere to turn on Single Sign-on for your account and you will need to provide them with below pieces of information.
- SAML HTTP Endpoint: Under the Single Sign-on tab copy the SAML HTTP Endpoint under SAML Endpoints.
- SAML Metadata XML file: Under the Single Sign-on tab, goto the x.509 certificate and click on the “Download your X.509 Certificate”.
- SAML HTTP Endpoint: Under the Single Sign-on tab copy the SAML HTTP Endpoint under SAML Endpoints.
- Click here to enter information gathered in step#7 and submit it to FilesAnywhere
Login page
Once the Integration is enabled by FilesAnywhere, you will see the SSO button on your login page. Using SSO button users can input OneLogin credential and login into FilesAnywhere.
Still Have Questions?
If you need help or have additional questions, please contact us.
0 Comments