Users can now add a Survey field to their eForms. The Survey field is perfect for when a user wants to collect data with various questions using the same answer options.
I.E. Interested / Neutral / Not Interested
Note: For Business Starter plans, Survey fields are limited to 5 questions per field. However, Professional plans do not have this limitation.
Table of Contents
- Adding a Survey field to the eForm
- Key Components of the Survey field
- Classic eForm Survey field display
- Sample Survey
Adding a Survey field to the eForm
1) Log into your account.
2) Navigate to the eForms dashboard by clicking on eForms at the top of the screen.

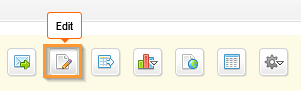
3) Once on the eForms dashboard, click the Edit button to edit your existing form.
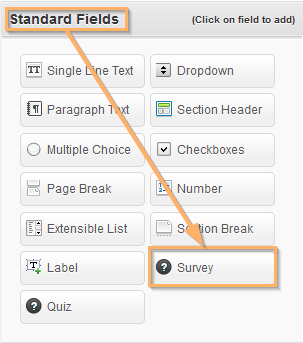
4) Once you are on Step 2, look on the right-hand side in the Standard Fields section. The Survey field will be at the bottom. Click on it to add it to your form.
Key Components of the Survey field
The Survey field has a lot of integrated options, so let's break it down.
Here's what the field looks like when a user is editing it.
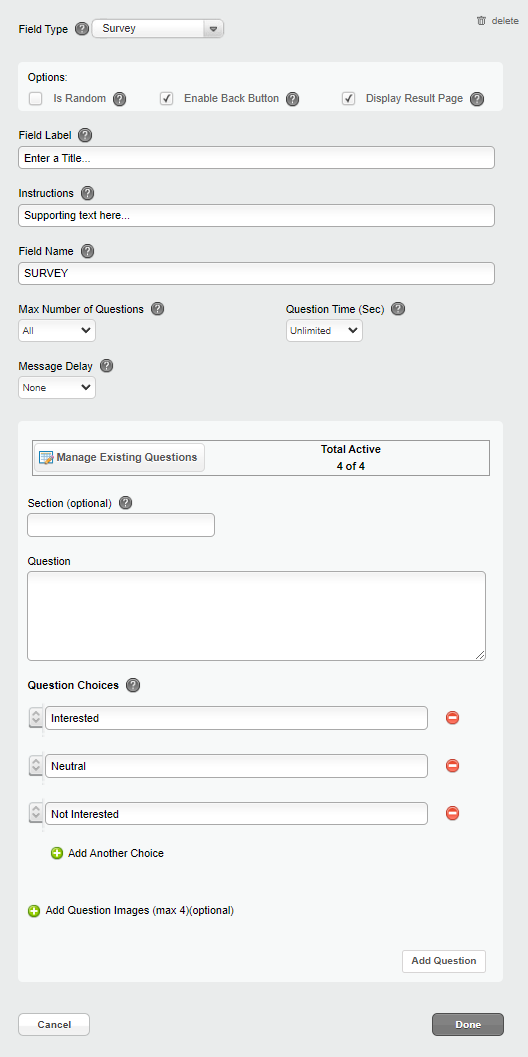
Here's the breakdown and explanation of the components.
Options Section
This section is focused on enabling or disabling specific features for your survey.
![]()
- Is Random - Enabling this option will randomize the order of your questions.
- Enable Back Button - This displays a back button that the guest can use to navigate to a previous question.
Note: You cannot have the Back Button and a Question Timer active at the same time. - Display Result Page - This will cause a "Thank You" page to appear after the survey is completed.
Field Information Section
This section is used to identify and provide instructions for your survey.
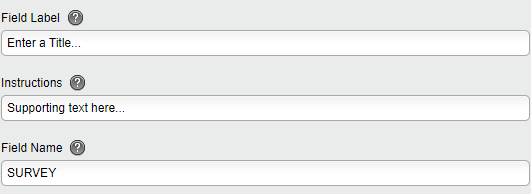
- Filed Label - This is where you will name your survey.
- Instructions - You can enter in additional instructions here, such as "You have five minutes to take this survey."
- Field Name - This is used to identify the field within your Data viewer.
Question Settings Section
This section is where you can adjust the settings for how the questions behave.
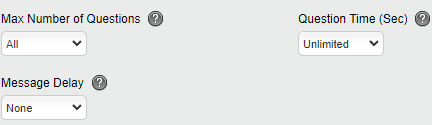
Default
Custom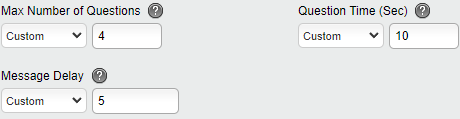
- Max Number of Questions - This allows you to restrict the survey to a set number of active questions. For example, you have 10 questions, but only want 5 questions displayed to the guest per survey.
Note: If the 'Is Random' option is not enabled, then the questions selected will be in order from the first question entered onward. So if 5 is entered, then the first 5 questions will be displayed. - Question Time (Sec) - Use this to set the time limit for each question. A countdown will display in the top right-hand corner of the survey. Otherwise, the default is set to unlimited and no timer will display.
- Message Delay - This setting allows you to insert a delay once a question is answered, so that the question remains on the screen before transitioning to the next one.
Manage Existing Questions Section
This section is for editing existing active and inactive questions.
Note: This section will only appear once you have entered a question into the survey.
![]()
- Manage Existing Questions - Click on this to pull up a grid of all the questions you have entered into this survey.
- Total Active - This displays the number of total active questions. It is possible for you to have inactive questions in your survey that you can turn on at a later date.
Once you click on the Manage Existing Questions button, a popup grid will appear.
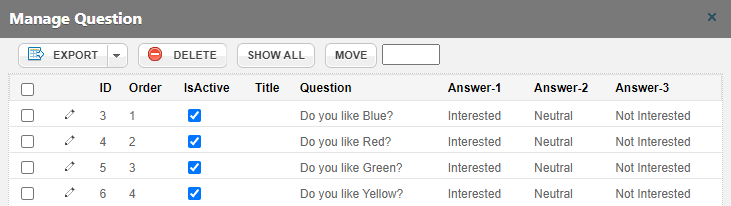
- Export - This will export all the questions into an excel spreadsheet.
- Delete - By checking the box next to a question and pressing this, you will delete the question completely.
- Show All - This flips from Show All to Per Page. By default questions are displayed at 30 per page.
- Move - By checking a question and entering an order number, you can move a question up or down the list.
- IsActive - Check or uncheck questions to turn them on and off in your survey.
- Edit - By clicking on the pencil icon next to a question, you can edit the existing question. A popup will appear where you can make changes to the question.
Editing an existing question
Here you can see all the previously entered information and make changes as needed.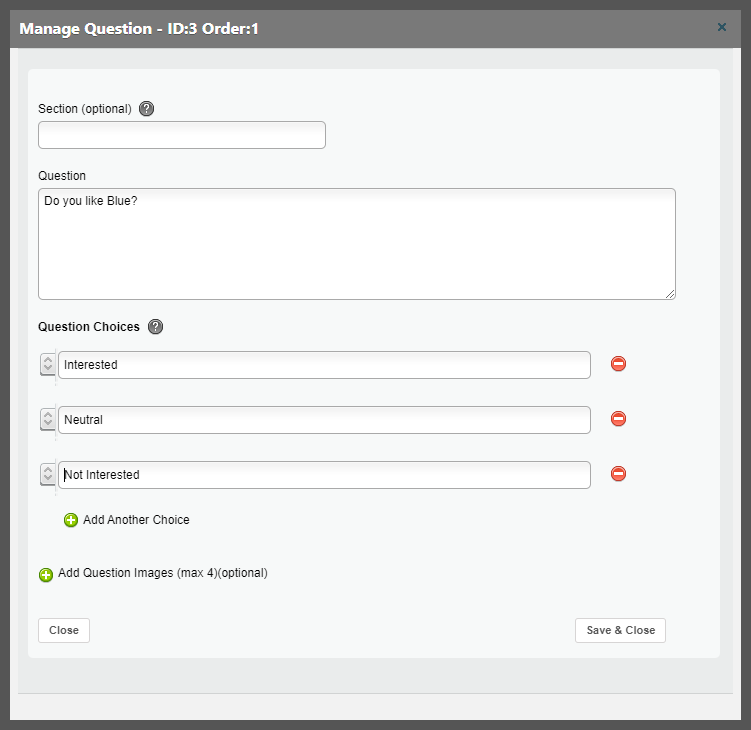
- ID - This is the identification number of the question entered.
- Order - This is the order in which the question is listed.
Add Question Section
This is where you can add the questions for your survey one at a time.
Note: There is no bulk import available.
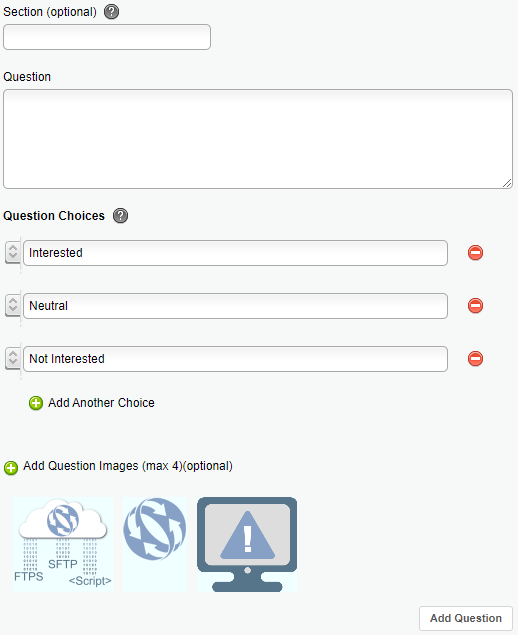
- Section (optional) - This is a way to indicate a question is part of a theme. I.E. if you enter "Outdoors" as the section, then when that question displays, the section will also display on the screen.
- Question - This is where you will enter the question in simple text.
Note: This box does not support formatting. - Question Choices - These are the choices for your question. In a survey all questions share the same answers. Once you add the choices (using the Add Another Choice link) for the first question, these choices will persist for every question onward.
- Add Question Images - This allows you to add images associated with the question being created.
Classic eForm Survey field display
When using a survey in an eForm, here's how it will display in a classic form on the guest user's side.
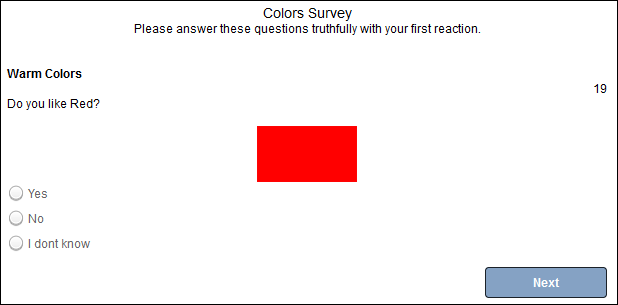
- Survey Label - "Colors Survey"
- Instructions - "Please answer these questions truthfully with your first reaction."
- Section - "Warm Colors"
- Quesiton Time - "19" The counter will count down to 0 and then switch to the next question if no answer given.
- Question - "Do you like Red?"
- Image - The red box is an image related to the question
- Choices - "Yes", "No", "I dont know"
- Navigation - Back & Next buttons.
Note: The Back button doesn't appear unless the 'Enable Back Button' option is enabled.
Note: Also, the Question Timer and Back button cannot be enabled at the same time.
Sample Survey
Click here to view a sample survey that we have created
Still Have Questions?
If you need help or have additional questions please contact us.
0 Comments